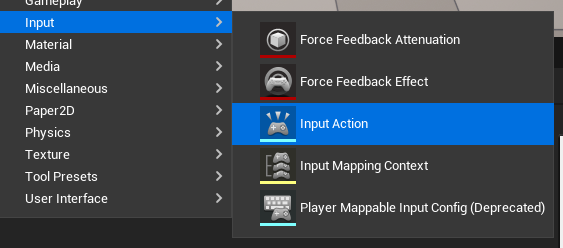
Input Action
플레이어의 입력을 처리하기 위한 중요한 구성 요소로 게임 내에서 키보드, 마우스, 게임패드 등 다양한 입력 장치를 통해 발생하는 이벤트를 간편하게 관리하고 처리할 수 있습니다.
Value Type
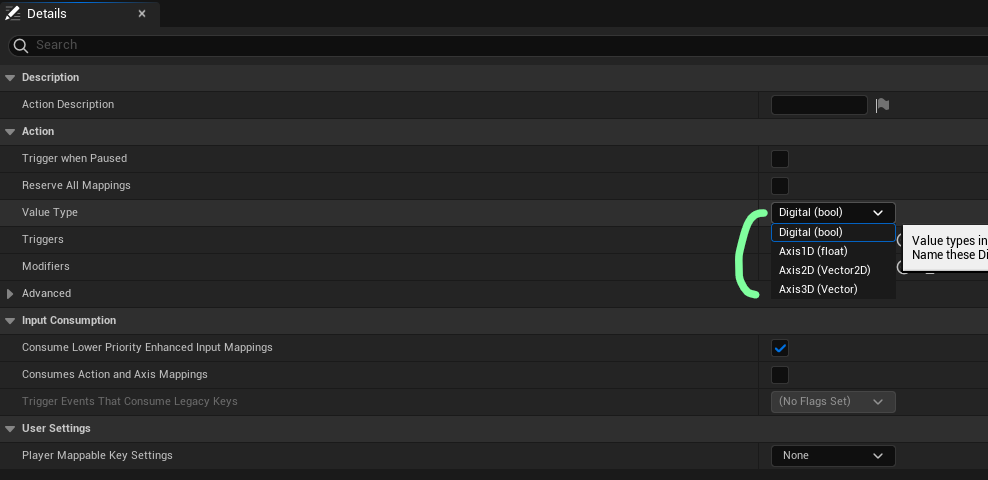
Value Type 설명
Digital
- 설명: 디지털 입력은 이진 입력입니다. 즉, 입력이 참(True) 또는 거짓(False)인 경우를 처리합니다. 키보드의 키 누름, 마우스 버튼 클릭, 게임패드 버튼 누름과 같은 입력에 사용됩니다.
- 예: 스페이스바를 눌러 점프하는 동작, 마우스 왼쪽 버튼을 눌러 총을 쏘는 동작.
UEnhancedInputComponent->BindAction(JumpAction, ETriggerEvent::Triggered, this, &AMyCharacter::Jump);Axis1D
- 설명: 1차원 축 입력입니다. 이는 주로 아날로그 입력을 처리하는 데 사용되며, 입력 값은 -1에서 1 사이의 부동 소수점 값입니다. 게임패드의 아날로그 스틱이나 마우스 축 움직임에 사용됩니다.
- 예: 캐릭터의 앞뒤 이동 (W와 S 키 또는 게임패드의 왼쪽 스틱의 Y축).
UEnhancedInputComponent->BindAxis("MoveForward", this, &AMyCharacter::MoveForward);Axis2D
- 설명: 2차원 축 입력입니다. 두 개의 1차원 축을 결합한 것으로, X와 Y 값으로 구성된 벡터를 사용합니다. 주로 게임패드의 아날로그 스틱, 마우스 움직임 또는 터치 입력을 처리하는 데 사용됩니다.
- 예: 캐릭터의 이동 방향 (게임패드의 왼쪽 스틱), 카메라의 회전 (마우스 움직임).
UEnhancedInputComponent->BindAxis2D("Look", this, &AMyCharacter::Look);Axis3D
- 설명: 3차원 축 입력입니다. X, Y, Z 값으로 구성된 벡터를 사용하며, 주로 3차원 공간에서의 이동이나 회전 입력을 처리하는 데 사용됩니다.
- 예: VR 컨트롤러의 위치 추적, 3D 공간 내의 방향 이동.
UEnhancedInputComponent->BindAxis3D("Move3D", this, &AMyCharacter::Move3D);사용 예시
Digital 입력 예시
- 키보드 스페이스바를 사용하여 점프
UEnhancedInputComponent->BindAction(JumpAction, ETriggerEvent::Triggered, this, &AMyCharacter::Jump);1D 축 입력 예시
- 게임패드의 아날로그 스틱 Y축을 사용하여 앞뒤 이동
UEnhancedInputComponent->BindAxis("MoveForward", this, &AMyCharacter::MoveForward);2D 축 입력 예시:
- 게임패드의 아날로그 스틱을 사용하여 이동 방향 설정
UEnhancedInputComponent->BindAxis2D("MoveDirection", this, &AMyCharacter::MoveDirection);3D 축 입력 예시:
- VR 컨트롤러의 위치를 사용하여 3D 공간 내에서 이동
UEnhancedInputComponent->BindAxis3D("Move3D", this, &AMyCharacter::Move3D);I nput Mapping Context
Input Mapping Context는 여러 Input Action을 그룹화하고, 각 Input Action을 특정 키나 버튼에 매핑하는 설정을 포함합니다. 이를 통해 개발자는 게임에서 다양한 입력 장치(키보드, 마우스, 게임패드 등)를 쉽게 관리하고 설정할 수 있습니다.
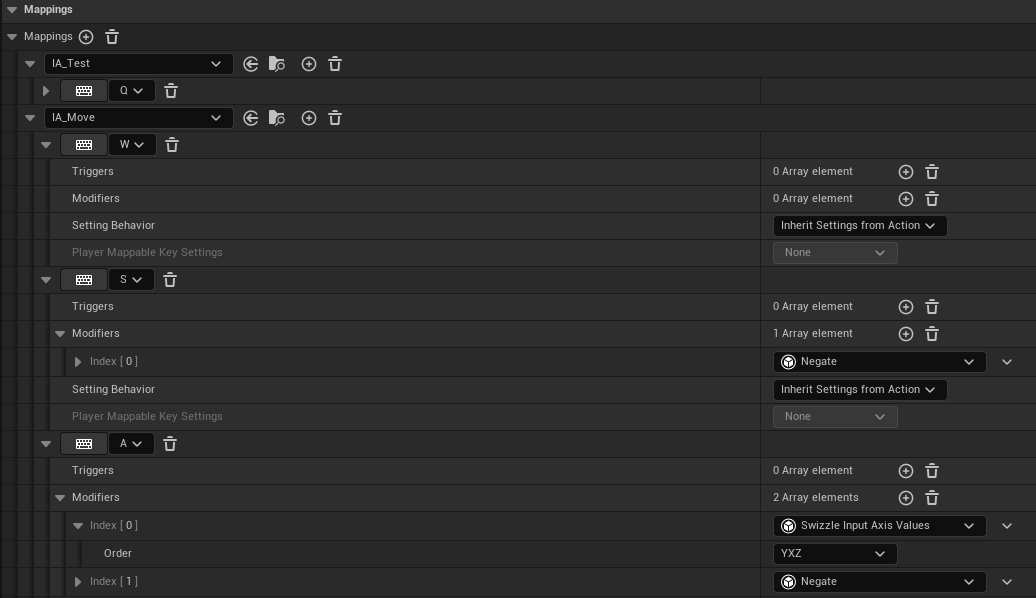
블루프린트 예시
1. Input Action과 Input Mapping Context 생성

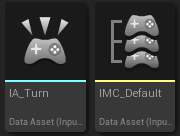
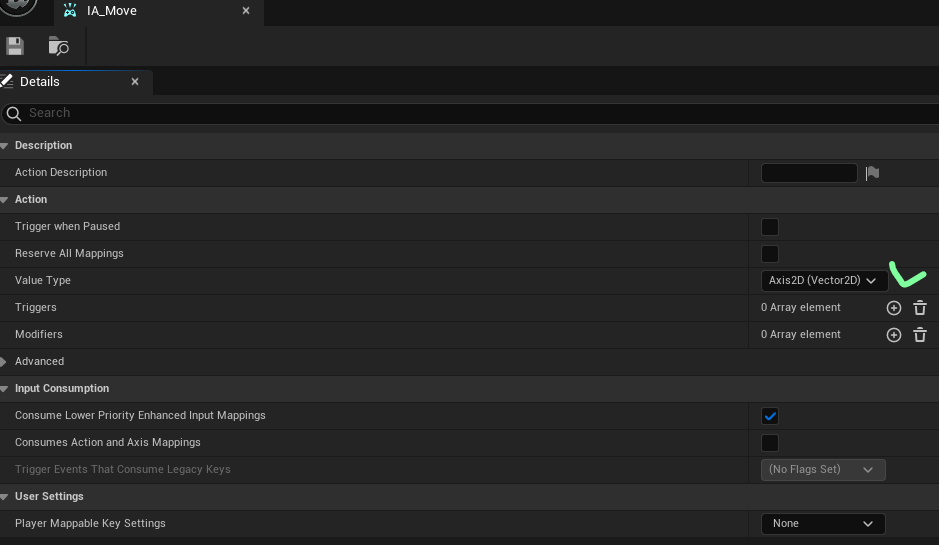
2. Input Action 설정
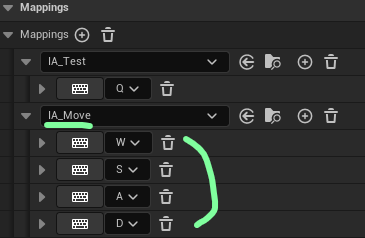
3. Input Mapping Context 설정
4.블루프린트에서 Input Mapping Context 연결
Get Controller -> Cast To PlayerController -> getenhancedinputlocal -> Add Mapping Context

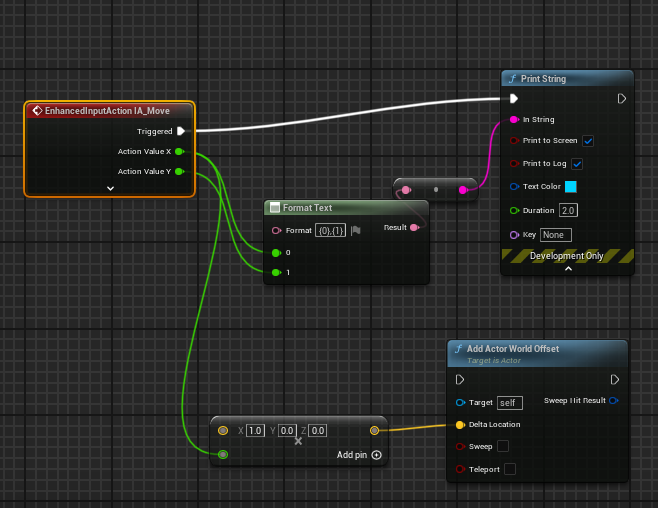
5. 블루프린트에서 Input Action 연결
만들어 놓은 IA_Move-> Format Text -> Print String 으로 출력
소스 예시
1. 먼저 인풋을 사용하기위해 .Build.cs파일에 PublicDependencyModuleNames.AddRange뒤에 EnhancedInput를 추가해 준다.
PublicDependencyModuleNames.AddRange(new string[] { "Core", "CoreUObject", "Engine", "InputCore", "EnhancedInput" });
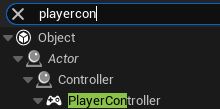
2. PlayerController 생성
3. 소스
#pragma once

#include "CoreMinimal.h"
#include "GameFramework/PlayerController.h"
#include "R1PlayerController.generated.h"

struct FInputActionValue;
/**
 *
 */
UCLASS()
class R1_API AR1PlayerController : public APlayerController
{
	GENERATED_BODY()

public:
	AR1PlayerController(const FObjectInitializer& ObjectInitializer);

protected:
	virtual void BeginPlay() override;
	virtual void SetupInputComponent() override;

protected:
	void Input_Test(const FInputActionValue& InputValue);
	void Input_Move(const FInputActionValue& InputValue);
	void Input_Turn(const FInputActionValue& InputValue);

protected:
	UPROPERTY(EditAnywhere, Category = Input)
	TObjectPtr<class UInputMappingContext> InputMappingContext;

	UPROPERTY(EditAnywhere, Category = Input)
	TObjectPtr<class UInputAction> TestAction;

	UPROPERTY(EditAnywhere, Category = Input)
	TObjectPtr<class UInputAction> MoveAction;

	UPROPERTY(EditAnywhere, Category = Input)
	TObjectPtr<class UInputAction> TurnAction;
};
#include "Player/R1PlayerController.h"
#include "EnhancedInputComponent.h"
#include "EnhancedInputSubsystems.h"
#include "Kismet/KismetMathLibrary.h"


AR1PlayerController::AR1PlayerController(const FObjectInitializer& ObjectInitializer)
	:Super(ObjectInitializer)
{
}

void AR1PlayerController::BeginPlay()
{
	Super::BeginPlay();

	//ULocalPlayer 범위가 있는 싱글톤
	if (auto* Subsystem = ULocalPlayer::GetSubsystem<UEnhancedInputLocalPlayerSubsystem>(GetLocalPlayer()))
	{
		Subsystem->AddMappingContext(InputMappingContext, 0);
	}
}

void AR1PlayerController::SetupInputComponent()
{
	Super::SetupInputComponent();

	if (auto* EnhancedInputComponent = Cast<UEnhancedInputComponent>(InputComponent))
	{
		EnhancedInputComponent->BindAction(TestAction, ETriggerEvent::Triggered, this, &ThisClass::Input_Test);
		EnhancedInputComponent->BindAction(MoveAction, ETriggerEvent::Triggered, this, &ThisClass::Input_Move);
		EnhancedInputComponent->BindAction(TurnAction, ETriggerEvent::Triggered, this, &ThisClass::Input_Turn);
	}

}

void AR1PlayerController::Input_Test(const FInputActionValue& InputValue)
{
	GEngine->AddOnScreenDebugMessage(0, 1.0f, FColor::Cyan, TEXT("Test"));
}

void AR1PlayerController::Input_Move(const FInputActionValue& InputValue)
{
	FVector2D MovementVector = InputValue.Get<FVector2D>();

	if (MovementVector.X != 0)
	{
		FVector Direction = FVector::ForwardVector * MovementVector.X;
		GetPawn()->AddActorWorldOffset(Direction * 50.f);
	}
	if (MovementVector.Y != 0)
	{
		FVector Direction = FVector::RightVector * MovementVector.Y;
		GetPawn()->AddActorWorldOffset(Direction * 50.f);
	}

}

void AR1PlayerController::Input_Turn(const FInputActionValue& InputValue)
{

	float Val = InputValue.Get<float>();
	AddYawInput(Val);
}
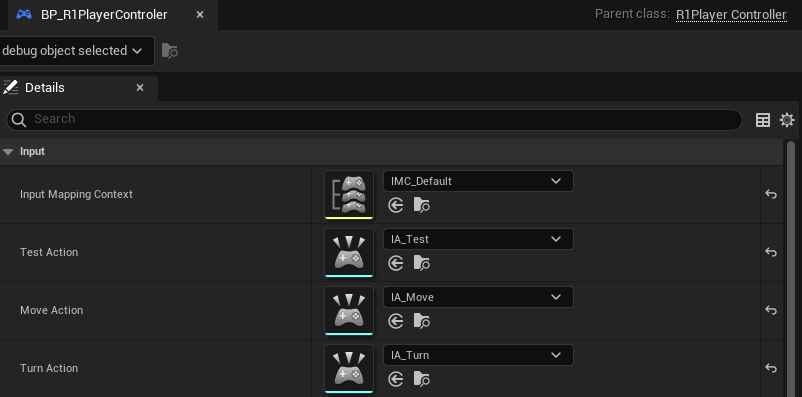
4. Input 연결
'Unreal' 카테고리의 다른 글
| [Unreal5] 데이터관리 (GameplayeTags, AssetManager, DataSet) (0) | 2024.06.05 |
|---|---|
| [Unreal5] 입력 설정 함수 (0) | 2024.06.05 |
| [Unreal5] Component 추가 및 속성 변경 (0) | 2024.05.30 |
| [Unreal5] 특정 조건에 맞는 액터를 찾기 및 이동 (0) | 2024.05.28 |
| [Unreal5] 오브젝트 Load 방법 및 생성 (1) | 2024.05.28 |